This is a minor variation on a method for dividing a square piece of paper into equilateral triangles. This method starts with the paper divided into three equal rectangles. The other method explored on this page starts with the paper divided into two rectangles.
1 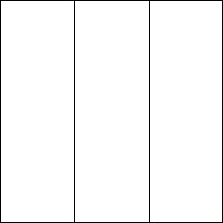 Start by dividing the paper into thirds. If you are not sure how to do so, some s to that effect can be found on Dr Stephen O'Hanlon's Origami Page. |
2 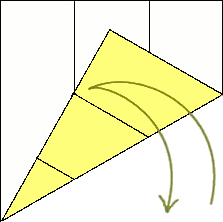 Fold the bottom right corner up and towards the upper middle part of the paper. To get the right angle, the bottom of the crease that you made on the right side should be touching the crease you made on the left side. Also, the bottom edge of the paper should form a line connecting the point where those two creases meet, and the bottom left corner of the paper. Then unfold it. |
3 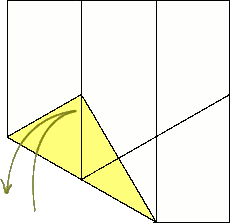 Now bring the bottom left corner up to meet the leftmost vertical crease. When doing so, the leftmost part of the bottom edge of the paper should form a line going from the left vertical crease to the very bottom of the right vertical crease. You'll notice also that the bottom of the crease made on the previous step should line up with the left vertical crease. Then unfold it. |
4 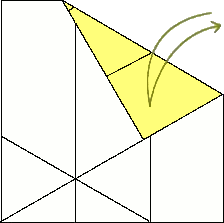 Fold the top right corner down so that the right edge of it lines up with the diagonal crease you made in step two. Then unfold it. |
5 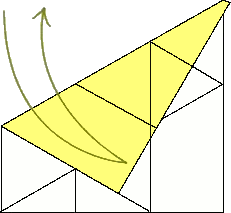 Then fold the top left corner down so that the left edge of it lines up with the crease you made in step 3. Then unfold it. |
6 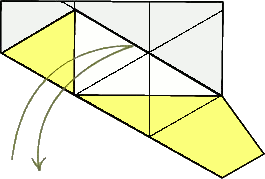 Now bring the crease you made in step 3 up to meet the crease you made in step 4. These should line up in such a way that the bottom right end of the creases are in the same place. You'll notice that several of the other creases you already made should line up nicely as well. Then unfold it. |
7 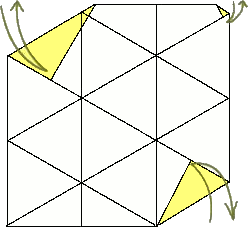 Now to put in the last three creases. Fold the top-left, top-right and bottom-right corners in so that their edges line up with the with the diagonal creases nearest to them (as displayed on the right). Then unfold them. |
8 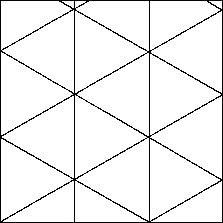 You now have the paper divided into three columns, and each of those are divided into equilateral triangles. This is of course, not a minimum. You could for instance, divide each of those columns into two, and then make the diagonal creases accordingly, giving you six columns |
If you haven't already seen it, you may want to see this same technique used on two columns instead of three. I invite you also to explore some of the shapes I've designed with this technique.